How to Schedule YouTube Videos
Mar 09, 2022
Social Media Platforms
YouTube can be a demanding place, requiring constant and consistent uploads from not only your viewers and fans, but also from the algorithm. Falling behind in your schedule can have a knock-on effect on not only your other work but the video performance as well. Luckily, YouTube has a nifty feature that allows you to schedule videos to be uploaded at a specific time.
With this feature, you can keep on top of your uploads meaning your videos won’t get lost in the sea of content that can be found on the platform. Being able to schedule your videos will take the pressure off and free you up to do other things rather than watch the clock. It also allows you the opportunity to test and optimise your upload times to best fit your audience and maximise your views.
If this is your first time scheduling videos we’ve got you covered. Keep reading to learn how to schedule YouTube videos
HOW TO SCHEDULE YOUTUBE VIDEOS ON A DESKTOP
Step 1
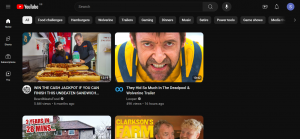
Step 1 in our guide on how to schedule YouTube videos on a desktop is to log into YouTube and set up your channel if you haven’t already!
Step 2
Next, go to YouTube Studio by clicking on your profile in the top right and clicking it from the menu. You can also get there by clicking this URL www.studio.youtube.com. Alternatively, you can click the camera next to the bell to skip past the YouTube Studio if you’ve done this skip to Step 4! Note: YouTube Studio has a variety of editing options and other tools that can help you out so we’d advise not skipping if you’re new to content creation.
Step 3
Click Create in the top right of the dashboard and select Upload video(s).
Step 4
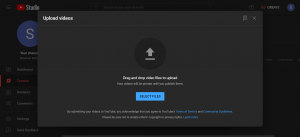
Upload your video by dragging and dropping your file or by clicking to select your video file from your computer. One thing to note is if you upload a video that is shorter than a minute and in 9:16 format it will be classified as a YouTube Short. This will mean it goes live in the shorts area and not the main video browser even though it will still publish to your channel.
Step 5
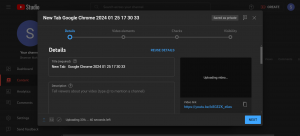
While the video uploads you can add your video information such as the title, description, thumbnail and more!
Step 6
Add captions and any subtitles you’d like to your video. These are all optional but have benefits. To add subtitles/captions. Click Add and upload a formatted captions file or you can play the video and manually type out captions. YouTube can do this automatically for some languages such as English however they may not be 100% accurate.
Step 7
Once that’s done you have the option to add an end card to your YouTube video which is an overlay graphic you find at the end of videos which allows people to click on other videos on your channel.
Fix any issues on the checks page which appears after video elements. This is where YouTube can detect if you have any copyright claims or other issues that need to be addressed before you can publish your video.
Now the video is all ready, you can schedule your video to go live. First, make sure the video is marked as public so everyone can watch it. Then simply pick a date and time in the Schedule box!
HOW TO SCHEDULE YOUTUBE VIDEOS ON MOBILE
Step 1
As always the first step in this how-to schedule YouTube videos guide is to open the YouTube App and tap the plus Icon in the middle of the navigation bar.
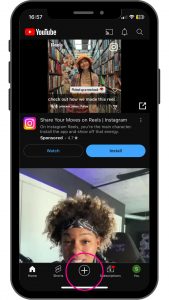
Step 2
Now you choose if you would like to post a video or short. Shorts are selected by default so if you want to choose a video simply select it from the bottom of the screen.
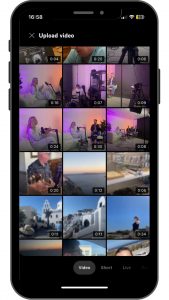
Step 3
Now choose the file you would like to upload and YouTube will bring up an editor where you can simply continue forward or edit it down into a Short.

Step 4
Similar to the how-to schedule YouTube videos on the desktop guide you can now add you’re video details including the title, description , setting a location and even adding a custom thumbnail.
Step 5
Now to schedule the video tap on Visibility and then schedule. From here choose your date and time then tap the back arrow to return to the details page.
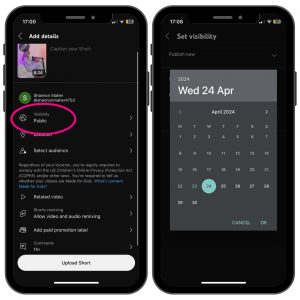
Step 6
Once all this is in order simply tap upload and you’re done!
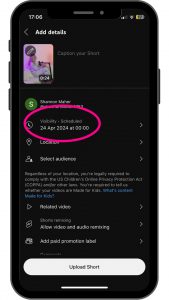
TOP TIPS FOR SCHEDULING YOUTUBE VIDEOS
Now you know how to schedule YouTube videos, here’s what you do to delete a scheduled video.
- First, log in to YouTube Studio and then go to the content section. From here, depending on what video you scheduled, pick either Videos or Shorts.
- Hover over the video you wish to delete and click the 3 dots
- From the menu choose delete forever, YouTube will then ask you for confirmation. Be sure to check the box then click delete forever.
And that’s it, your video is gone and there’s nothing to worry about!
Final Tips are to continue to work to a consistent schedule as the videos will more likely appear in the recommended tab and be sure to promote your scheduled videos on your socials to ensure your audience is ready when they release!
Our Influencer marketing agency and Social agency are located worldwide, with our agency network based in the USA, UK, UAE and China.
If you want to receive our industry insights, visit our Influencer Marketing & Social Media blog.
@ Socially Powerful
Popular Blogs
Most Popular Instagram Hashtags | Tiktok Hashtags | Instagram Monetization | Facebook Banner Size | Snapchat Influencers | Most Subscribed Youtubers | Best Time to Post on Youtube | UK Twitch Streamers | Female Twitch Streamers | Popular Tiktok Songs | Male Tiktok Influencers | Lgbtq Tiktok Influencers | The Rise and Fall of Clubhouse | Influencer Marketing on Clubhouse | LiketoKnowit | Pretty Little Thing Instagram| Top Social Marketing Agencies
Social And Influencer Marketing News + Insights
Get in touch
We'll show you how to start powerful conversation, drive social engagement, build your brand, hit sales targets or meet other goals you have, wherever you are in the world.
Work with us


